I would like to make a simple shiny button using photoshop elements
When making my scrap booking I do like to have some shiny buttons. Sometimes I use them for flower centers, as with this flower and sometimes I put the flowers in them :) the nice thing about this tutorial is that it is quick to make.

When it is finished you will have a button that is in layers and looks like the one below. Once made you will be able to fill it with papers, word-art or flowers and make it individual to your artwork. The buttons are really effective and we will be using some techniques you already know and show you some features which we haven't used yet. Like everything I do, once you have mastered it you will find lots of ways to use it in your other projects. Many things I do I learn by accident and this was one such happy accident.

Open a new window, 3cm by 3cm, 300 dpi and transparent. In your first layer put a solid circle 3cm by 3cm. Name it base circle.
In the layer above put a 'thin outline frame' circle again 3cm by 3cm, Name it rim layer. Select each layer and using the magic wand tool click and simplify each shape. Press control D to get rid of the marching ants.
Select the second layer and using the wand tool again click in the center, this will give marching ants on the inside ring. Select the first solid circle layer and click control and J. This will give you a new third layer that has a circle the exact size of the inner ring. Make this the top layer and name it inner circle or glass layer.
You now have 3 layers which look like this: click on the pictures to get them to enlarge so you can see them clearly.

On the right hand side menu is the effects tab, click on this, then on the second window in which is layer styles. Choose wow chrome. We will be using the 4th one called wow chrome shiny edge.
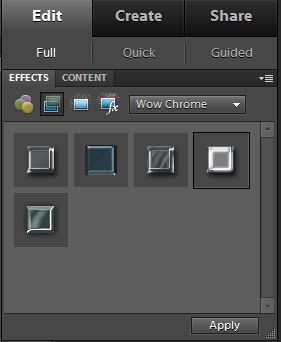
Starting with your base layer click on it and then click apply. This should give you a shiny round disc. In the layer an italic fx should now have appeared in the right hand corner. Hide the top 2 layers so you can see the base layer.

I want you to click on the fx to get the fx menu. Then uncheck the drop shadow and take the bevel to zero.

You will have a flat silver disc with a slight bevel. Hide this layer and go to the rim layer. Apply the wow shiny edge to this layer, go into fx and untick drop shadow, however, this time instead of taking bevel to zero, use the slider and move it gradually up and down until you find the best position for a shiny edge. I used 24.
Now click on the top layer. This time choose 'wow plastic' and apply wow plastic clear. Go into fx and uncheck drop shadow and glow. This will give a clear glass like layer over the top of your base circle. Your button should now look like picture 2.
For a little extra white shine, hide all the layers except the top glass layer. Open a new 3cm by 3cm window and drag the glass into it. Using the wand tool click on the white moon crescent shine at the top, it should now be selected, if enough is not selected go to the top menu and click on the select tab and go down to grow, do this until you have a nice crescent amount of white. Click control J. Hide the first layer and drag that crescent back into the button window. This will be your top accent layer. Use the directional buttons to get it just where you want it. Ta da! You are now done!
Your button should now have four layers. To change the color of the base layer... drag and drop a paper of your choice above it. Now click control and G at the same time to clip the paper to the base shape.
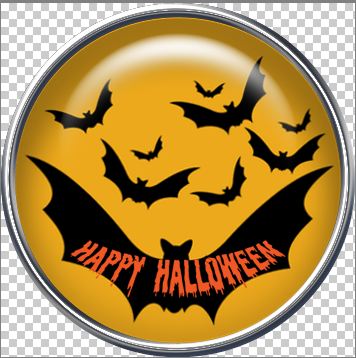
In the layer above your paper (or color) choice you can drop some wordart, or a flower, any element you like.
Once you have the paper and element go to the glass layer and click on it. Using the opacity slider, change the opacity until the glass is just enough to show without obscuring what is inside.You should now have a button that looks similar to this:
If you would prefer a gold rim, hide all the layers except the rim. Drop it into the new window. Under effects choose photographic and then sepia tone. Click apply. Make sure no other layer is showing and drop back into the button window, align over the button:

your rim should be a nice light gold color. For a brighter gold choose yellow tone.
Have fun with your button :)
Thank you very much!
ReplyDelete