Vellum Paper Scrap
If you have arrived here not having read any of my tutorials you will firstly need to go to 'how to make ricrac' and then 'how to make crystal ricrac' before you can make your vellum paper.
I left you with a really nice piece of crystal ricrac ribbon. Made up of 3 layers, the original, the edge and the fill. Hide all the layers except the outer edge layer. Using your marquee tool make a box around one edge. Try to start at the beginning of a wave and end at another. Get about 6 waves in. Click control J. You will now have just one edge. Hide the layer below.
It should look like this. I have clipped it so you can see closely, but of course the original box is bigger. Select this by clicking in the layer icon (you know how to do this now). Go to the top menu, click on image then crop.
Open a new window 10cms high by 10 cms wide. It may be a bit big but it doesn't mater. Drag and drop your wavy edge into it. We are now going to build the edges of our paper scrap.
It doesn't take a genius to work out you will need 4 sides. We are going to make three more layers of the wavy line and use rotate to get them in the right direction.
Click on your layer and drag it down to the new layer box (yes the tiny square you usually click on to get a new layer) tada, you now have 2 layers of your wavy line. Click on the new layer and rotate it 90 degrees right using the image tab at the top. Click image, rotate and then go down to layer 90 degree rotate. This way just one wavy line rotates. Repeat this step twice more until you have four wavy lines.
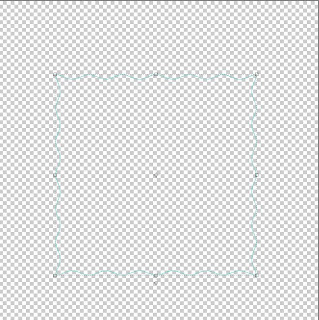
Using the move tool make your lines into a box. Once you click on them in move mode you can use the cursers keys left, right, up, down to fine adjust. You must make sure though that all the corners touch perfectly. You can do this by eye, unless you are OCD like me.
If you are OCD use align. Make sure the two outer edges are both aligned at the bottom. Then align the top, bottom and left using the left align. Finally select the two sides and the top and align to the top. A bit long winded but you will get the perfect square.
Go to the layer tab on the top menu, go down to merge visible. You will now have the outside edge to your paper scrap.
Pick the magic wand tool from the left hand tool menu, it looks like a stick with a flash on the end. Click in the middle of your square. Just the inside edge will have marching ants. Create a new layer and flood fill using paint bucket and your desired color. I am choosing a slightly off white. Use control D to deselect the marching ants. I think you know where we are now. Change the opacity of the fill to 60%. Merge all layers. You now have your vellum paper scrap.
This time shown over a rather attractive piece of patterned paper :)
Why stop here though, change the color of the edging to match your color scheme. Have the vellum in other colors.
Before you merge add a water mark to the vellum. Pick your water mark, lay it over the vellum and use the menu in layers where it says normal and pick soft light and the change the opacity.
I have added a swirl pattern, its very faint lol.
Think outside the box...make an oblong! When you make your four sides cut two down by a wave or two and assemble as above.
The permutations are endless. Think about what you have learned and how you can apply it to other projects. Never make one thing when you can make three lol.


No comments:
Post a Comment