I would like to make tartan paper/fabric in phtoshop elements
This one is super easy and the results are pretty good ;)
Open a window 5cm by 5cm, 300 per inch resolution,rgb,transparent.
All of the instructions I will use have been covered in my other tutorials so if there is something you come across that you are confused about, try reading how to make a perfect circle frame, or how to make a swiss dot pattern.
You have a choice, you can either choose 5 papers that you really like....or 5 colors that you really like.
If you are choosing colors then using the marquee tool mark out a 1cm by 5cm box and fill with a colour.
If you find it difficult to be exact pull out the rulers to 1cm spacing, then repeat until you have five different colors OR make one box, then duplicate the layer and change the color using the paint bucket tool... . do this 5 times with 5 different colors.
Spread evenly across the box with no gaps like this. If there are gaps, squish them all up, go to layer and click merge visible which is second from last and then stretch the layer to fit the window.

Or choose five papers you like and make the same arrangement. Again merge the visible layers using merge visible tab.
Now you have one layer with 5 stripes. Duplicate this layer.
Go to the image tab on the top row, click on it and click on rotate. A menu will pop out to the side. It's a bit tricky this one, you have to go across and stay on it or it will disappear, (really annoying sometimes but persevere). Go right down the list staying on the menu until you get to layer 90 left. It has to be this one, or otherwise both the layers turn 90 to the left. Click on it.
You will now have 2 layers, one horizontal, one vertical.
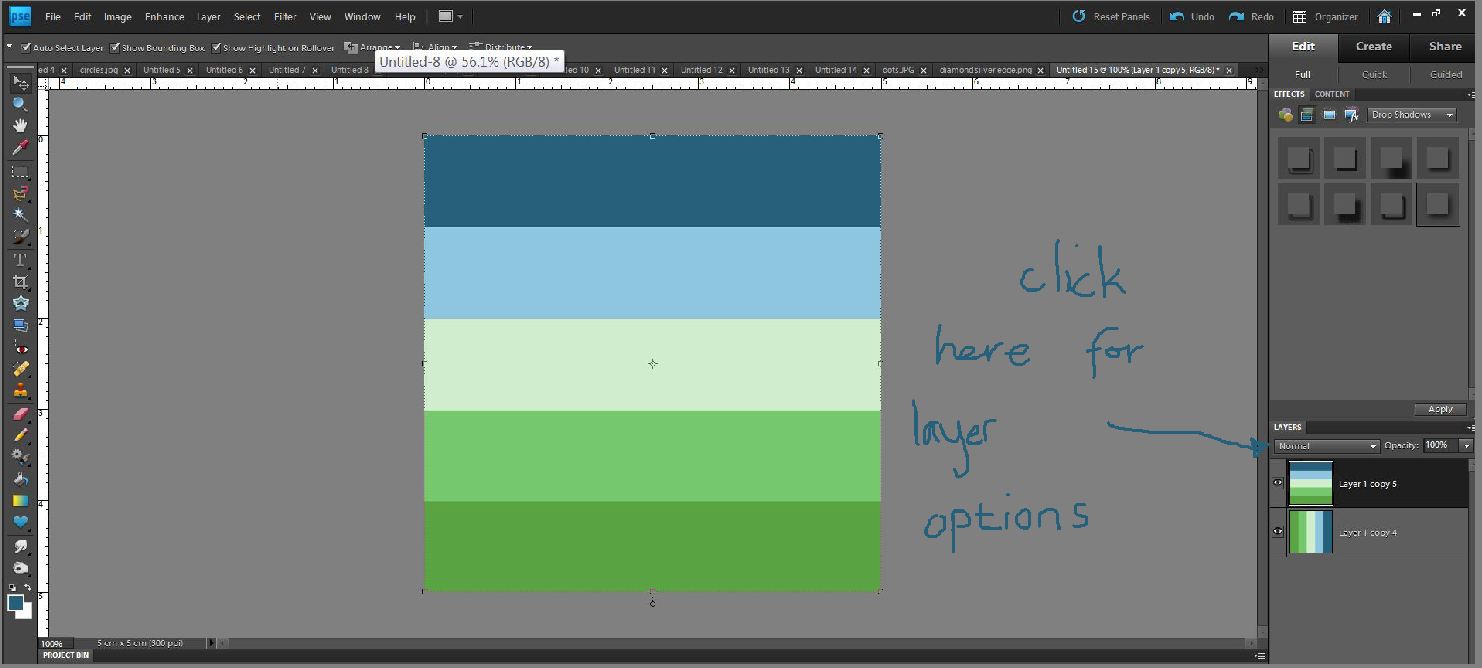
Click on layers where it says normal. The menu will come down. Click on normal and then use your directional keys to scroll through the menu. Watch what happens to the two layers. I usually use soft light, but check them all out. It's good to see how they change the colors.

I have chosen soft light and it looks like this. I like it a lot, a bit like one of Dougs shirts lol :)
Go to edit, then down to define pattern, (we use this a lot don't we). Save it with a witty name, I'm going with Dougs shirt...cos it makes me smile.
Open a new window 30 cm by 30 cm. Go to the layer tab on the top row, click on it, go down to new fill layer, your pattern will be the default pattern fill so click ok.
Change the scale right down to between 5 and 20
This is scale 5%

This is scale 15%

A very decent tartan or check paper. Time to add a bit of texture.
Go to the Filter tab on the top menu, go down to texture and click, then down to texturiser and click. A nice new menu will open. The forth box down is the one we are interested in. Click on it and choose one. I quite like canvas, but burlap is nice too. Try them out, if you don't like the results then press control Z and try another. It is going to be a bit of trial and error to start with :)
Sometimes it doesn't show up very well, sometimes it makes all the difference.

Here is one I made using 5 different papers. The papers are available in the free mini kit I have on my blog page
Here you can read my blog, and get some free elements and papers as well as read my other tutorials.
Good luck :)
No comments:
Post a Comment